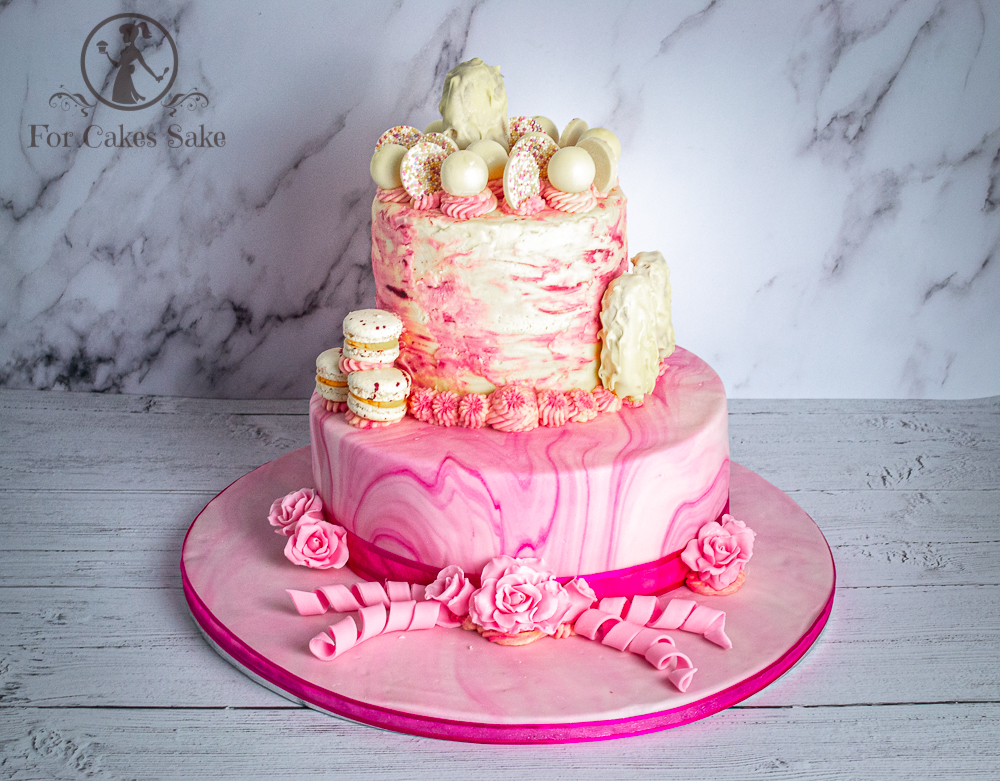
Top cake covering tips
If you’ve ever tried to cover a cake and been disappointed with the results then our top tips should get you back on the right track.
Start with a flat top!
Getting your cake nice and flat to start with will make a huge difference to it’s finish. There are many ways to do this, and I do a combination of all of these tips when I prepare my cake.
You can start by lowering the temperature of your oven and baking the cake for longer. It’ll rise far more evenly, and you may even end up with a perfectly flat top straight out the oven!
Wait 24 hours
Cakes are always much easier to work with the day after baking. So give it some time to rest, otherwise you risk turning it into a pile of crumbs.
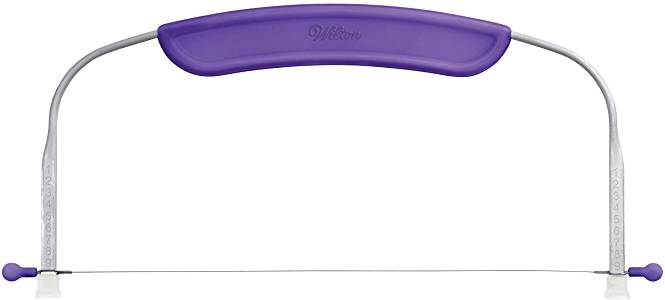
Use a Cake Leveller
If it’s not quite flat, or if you prefer to bake your cakes at a higher temperature, then use a cake leveller to take the domed top off. It’ll give you a perfectly even cut, with no risk of cutting yourself. You can also use your leveller to split your cake before filling. Your cake leveller will give you a nicely squared up cake, but we’re not done yet…
Put the bottom on the top!
Yep, once you’ve baked your perfectly flat topped cake you’ll probably want to cut it in half and fill it with all your favourite fillings. That is a good idea. But before you start slapping on the jam, simply rearrange the cake so that the bottom of the cake is on the top. It’ll give you a nice firm, flat edge to work with. Much better than a crumbly cut edge which will be a pain to cover. You’ll still need a reasonably flat middle, or you you’ll end up with a wobbly top, so your top flattening efforts have not been wasted.
Fill with caution
A well filled cake is a thing to behold, but beware, too much filling can ooze out giving your cake a bit of a midriff! To avoid this, add your jam to the underside of the top section and your buttercream to the top of the bottom section – make sense? Now, put your cake back together and place a sheet of parchment paper on top of the cake, and then a book on top of that, (not War and Peace, you’ll end up with a pancake!) and put that in the fridge for an hour or so. The weight of the book will push out any excess filling, if there is any, leaving you free to finish off your cake without any worries of unexpected “muffin tops”!

Add a crumb coat
A “what coat”?? A crumb coat is a thin layer of buttercream or ganache that is used to catch all the loose crumbs around the edge of your cake. Once you have them tangled up in your coating, it will be much easier to add the next layer and you won’t have a bunch of crumbs ruining your fabulous finish.
Don’t go mad though, the crumb coat only needs to be a thin layer. You should still be able to see cake through it. Once your crumb coat has chilled and set, you can add another thin layer. Neither of these layers have to perfect, so don’t worry too much at this stage, just get them reasonably smooth. You’ll be adding another layer anyway.
Now, wait – again!
Yep, more waiting. If you plan to add a layer of fondant then leave your butter creamed cake overnight to firm up. Leave it in the fridge if it’s warm in your house, otherwise it should be fine at room temperature. This will make it much easier to add the fondant and will prevent the buttercream from going too squishy while you smooth out your fondant. Using ganache will give you an even firmer surface to cover. It’s definitely worth switching to ganache if you struggle to keep your buttercream firm enough to cover.
If you plan to add more buttercream then you are ready to continue after an hour or so.
Warm it up!
Cold buttercream and cold fondant are a nightmare to use.
Pop your buttercream in the microwave for 15 seconds, once or twice, to loosen it up. It’ll be much easier to spread, and smooth.
Your fondant will also be easier to use when it’s not cold. Take plenty of time to kneed and massage it in your hands. This will make it lovely and stretchy. You’ll know when it’s ready to use as it’ll stretch when you try to pull it apart instead of breaking. The stretchier it is the better it’ll be.
Don’t be stingy
Whatever you are using, there is a good chance that you aren’t using enough of it.
If you are using buttercream then slap it on. You’ll be doing a lot of scrapping back, so don’t worry too much that you might overdose your guests.
If you are using fondant, making sure you have enough will ensure you don’t roll it too thin. Thin fondant causes tears and stretch marks which are difficult to fix. Having too much is not ideal either as it will be difficult to manage when you are smoothing it.
To cover a 6 x 4 inch cake you’ll need approximately 750g of fondant or buttercream, plus extra buttercream to fill between the layers.
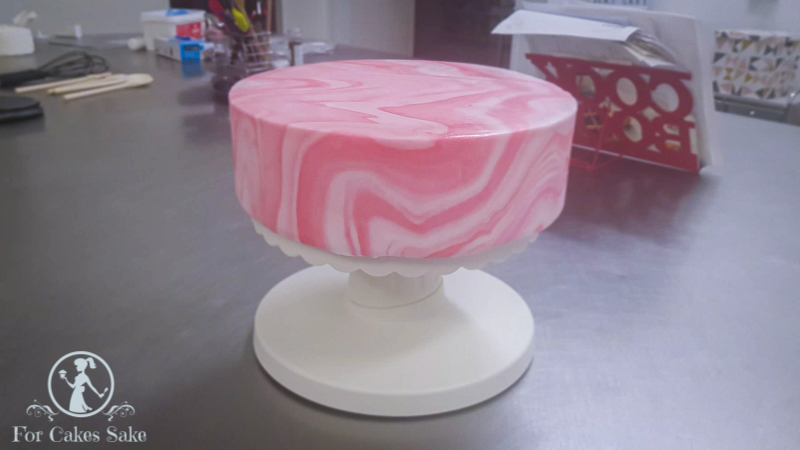
Now, smooth, smooth and keep on smoothing (or scrapping)…
Once you have your fondant or final buttercream layer on it’s tempting to just give it a quick smooth over and call it a day. But, there is a good chance that you will be somewhat disappointed with your work, and decide you were not cut out for this kind of stuff. But, don’t give up just yet. Ten more minutes with a smoother could make all the difference to your fondant. And a couple more goes with a metal scrapper may be all you need.
It’s worth noting that most pro’s spend ages at this stage, smoothing, scrapping, adding more buttercream, smoothing again, scraping more, and so it goes on, and on. So don’t worry if you seem to be faffing for ages – everybody does!
Have the right tools
It will really help to have a good set of tools around the place. Here is my must have list…
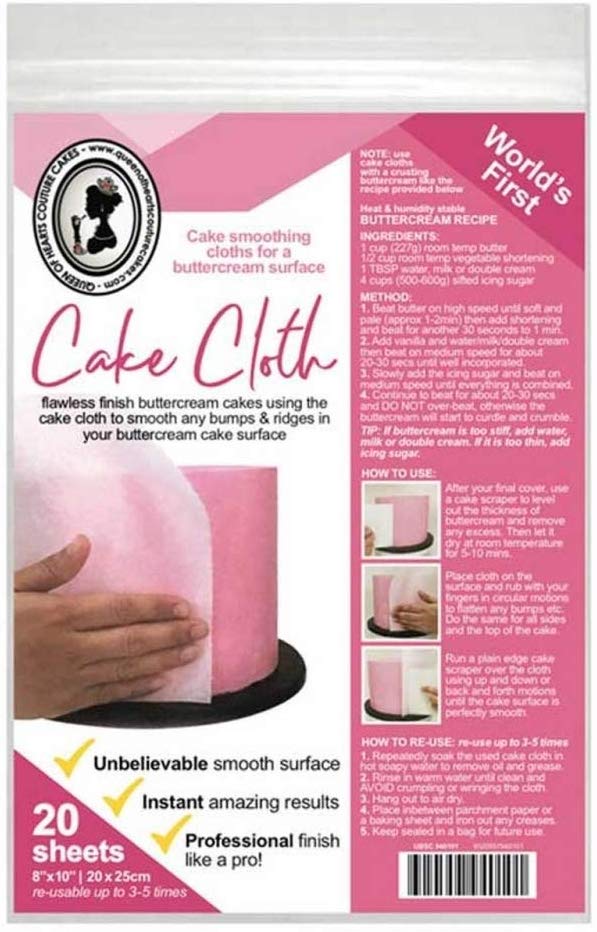
Cake Cloths – These are fab for finishing off a buttercream cake. Just hold the cloth against the side of the cake and use a smoother to rub out any imperfections – proper game changer.
Cake Leveller – Essential for a perfectly flat and even slice of cake. I don’t know how people managed to get a flat top with a knife!
Cake Smoothers – You’ll definitely need these little plastic smoothers if you are using fondant. Use two together for those elusive sharp edges.
Metal Scrappers – Any scraper will do for smoothing your buttercream or ganache. But, a metal one can be warmed for an even better finish.
Angled Palette Knife – If you’ve always used a flat palette knife to buttercream your cake then you’ll not know yourself when you switch to an angled one!
Turntable – You just can’t cover a cake without a decent turntable. Choose one with a non-stick top or buy non-slip matting and place it between your turntable and cake. But – ditch the turntable when you apply your fondant. The extra height may cause it to tear. Better to put your cake on the worktop while you apply your fondant. And don’t put it back onto the turntable until you have removed most of the excess. You can put it back when you are ready to start smoothing.
Take a class
Failing all that, there is bound to be a local class where you can learn how to do it first hand. We run classes in Dundee, but if you are further afield check in with your local cake decorating shop, as they are bound to know of one that would suit you.